Plastering a wall may seem like a daunting task, but with the right guidance and a little patience, you can achieve professional-looking results. Whether you’re renovating your home or simply looking to refresh your interior, plastering is a skill that can come in handy. In this comprehensive guide, we’ll take you through the step-by-step process of plastering a wall, from preparing the surface to applying the final coat. By the end of this article, you’ll have the knowledge and confidence to tackle your plastering project with ease.
Materials and Tools You’ll Need
Before you start plastering, it’s essential to gather all the necessary materials and tools. Here’s a list of what you’ll need:
- Plaster mix: Choose between pre-mixed plaster or mix your own with plaster and water.
- Plastering trowel: A trowel with a flat, smooth blade for applying and smoothing plaster.
- Hawk: A flat, square board with a handle for holding the plaster.
- Bucket: To mix the plaster if you’re not using pre-mixed plaster.
- Water: Clean water for mixing the plaster and keeping your tools moist.
- Drop cloths or plastic sheets: To protect the floor and surrounding areas from plaster splatter.
- Paintbrush: For wetting the wall before plastering.
- Sandpaper: To smooth the wall surface before plastering.
- Dust mask and safety goggles: For protection against dust and debris.
- Step ladder or scaffold: Depending on the height of the wall.
- Corner bead: For sharp, clean corners.
Step 1: Surface Preparation
Proper surface preparation is crucial for a successful plastering project. Follow these steps to prepare your wall:
- Clear the area: Remove any furniture, decorations, or items that might be in the way. Cover the floor with drop cloths or plastic sheets to catch any plaster that may fall.
- Clean the wall: Remove any loose paint, wallpaper, or debris from the wall’s surface. Use a scraper and sandpaper to smooth the surface and create a clean, even canvas for plastering.
- Repair any cracks or holes: Fill any cracks or holes in the wall with patching compound and allow it to dry thoroughly. Sand the patched areas until they are flush with the wall.
- Wet the wall: Before applying plaster, dampen the wall surface with a paintbrush or spray bottle. This helps the plaster adhere better and prevents it from drying out too quickly.
Step 2: Mixing the Plaster
Now that your wall is prepped and ready, it’s time to mix the plaster. If you’re using pre-mixed plaster, follow the manufacturer’s instructions. If you’re mixing your own plaster, here’s how to do it:
- Pour clean water into a bucket.
- Gradually add plaster to the water while stirring continuously. Follow the plaster manufacturer’s recommended water-to-plaster ratio for the desired consistency. The mixture should be smooth and lump-free.
- Let the plaster slake for a few minutes, then give it a final stir.
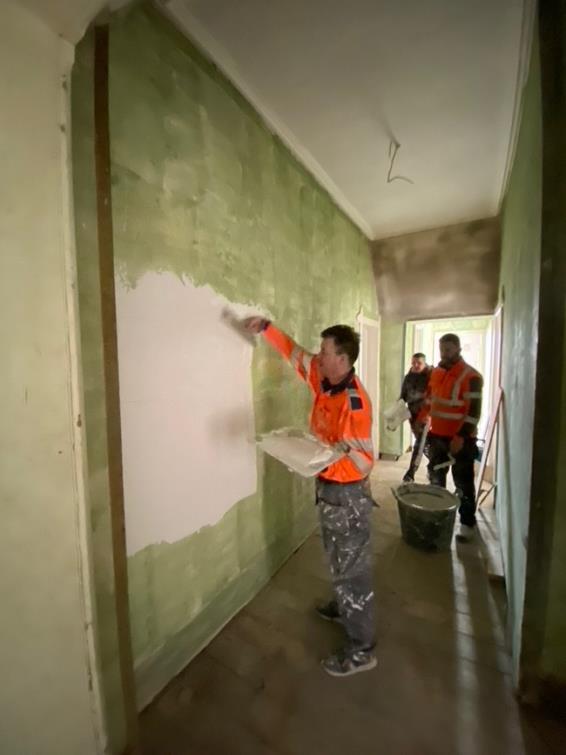
Step 3: Applying the First Coat
Applying the first coat of plaster, also known as the “scratch coat,” is the foundation of your wall’s finish. Follow these steps for a successful application:
- Start in a corner: Begin plastering in the top corner of the wall and work your way down. Apply plaster to the wall using the hawk and trowel.
- Create a flat surface: Use the trowel to spread the plaster evenly over the wall. Keep the trowel at a slight angle and apply pressure to create a flat surface.
- Scratch the surface: While the plaster is still wet, use a scratching tool or the edge of your trowel to create shallow scratches or grooves in the surface. This will help the next coat adhere better.
- Work in sections: Plaster the wall in manageable sections, ensuring each section overlaps slightly with the previous one for a seamless finish.
- Pay attention to corners and edges: Use a corner bead to create sharp corners and edges. Press it into the wet plaster and smooth it with your trowel.
- Allow the scratch coat to dry: Give the scratch coat ample time to dry and cure, typically 24 hours.
Step 4: Applying the Second Coat
Once the scratch coat is dry, it’s time to apply the second coat of plaster, known as the “brown coat.” This coat is thicker and provides additional strength and smoothness to the wall:
- Wet the wall: Dampen the surface with a paintbrush or spray bottle before applying the brown coat.
- Mix the plaster: Prepare the plaster mix as you did for the scratch coat.
- Apply the brown coat: Using your trowel, spread the plaster evenly over the wall, covering the scratch coat completely. Feather the edges to blend it with the surrounding surface.
- Smooth and level: Use a long, sweeping motion with your trowel to smooth and level the brown coat. Keep your trowel slightly angled and maintain even pressure.
- Check for imperfections: Inspect the surface for any imperfections, such as ridges or bumps, and use your trowel to correct them.
- Allow the brown coat to dry: Let the brown coat dry for at least 24 hours or as per the plaster manufacturer’s instructions.
Step 5: Applying the Finish Coat
The final coat, also known as the “finish coat,” is where you achieve the desired texture and appearance for your wall. Follow these steps:
- Wet the wall: Dampen the brown coat with a paintbrush or spray bottle.
- Mix the plaster for the finish coat, ensuring it has a smooth, creamy consistency.
- Apply the finish coat: Spread the finish coat evenly over the wall with your trowel, working in small sections. Use light pressure to achieve the desired texture.
- Texture the wall (if desired): Depending on your preferences, you can use various techniques to create different textures, such as a smooth finish, swirls, or stippling. Experiment on a small section to find the look you want.
- Feather the edges: Blend the finish coat with the surrounding area to create a seamless transition.
- Final inspection: Inspect the wall for any imperfections or areas that need touch-ups. Address them before the plaster starts to set.
- Allow the finish coat to dry: The drying time for the finish coat may vary depending on the type of plaster used. Follow the manufacturer’s instructions.
Step 6: Sanding and Finishing
Once the finish coat is completely dry, you may need to sand the surface to achieve a perfectly smooth finish. Here’s how:
- Use fine-grit sandpaper to lightly sand the wall, focusing on any uneven areas or imperfections.
- Wipe away the dust with a clean, damp cloth.
- If necessary, apply a second coat of finish plaster and repeat the sanding process.
Step 7: Painting or Decorating
Now that your plastered wall is smooth and ready, it’s time to paint or decorate it to your liking. You can use various painting techniques and colors to achieve the look you desire. Make sure to choose high-quality paint and follow the manufacturer’s recommendations for application.
Conclusion
Plastering a wall is a rewarding DIY project that can transform the look and feel of your space. With the right materials, tools, and techniques, you can achieve a professional finish that enhances the beauty of your home. Remember to take your time, follow each step carefully, and don’t rush the drying process between coats. So, roll up your sleeves and get ready to enjoy the satisfaction of a beautifully plastered wall in your home.