When it comes to home improvement and construction, one of the essential skills to master is plastering. Plastering is the process of applying a smooth, even layer of plaster to walls and ceilings, creating a clean and finished look. Whether you’re renovating your home or working on a new construction project, understanding the art of plastering can make a significant difference in the overall aesthetics and durability of your walls and ceilings.
In this comprehensive guide, we’ll delve into the world of plastering, covering everything from the basics to advanced techniques. By the end of this blog, you’ll have a solid understanding of plastering and the tools and steps involved.
The Basics of Plastering
1. Understanding Plaster
Before we get into the nitty-gritty of plastering, let’s start with the basics. Plaster is a mixture of various materials, typically including gypsum, lime, sand, and water. It has been used for centuries to create smooth and durable wall and ceiling finishes. Plaster comes in various forms, such as gypsum plaster and lime plaster, each with its unique properties and applications.
2. Essential Tools and Materials
To get started with plastering, you’ll need some essential tools and materials. Here’s a list of what you’ll require:
- Plaster: As mentioned earlier, you can choose from various types of plaster, such as gypsum or lime, depending on your project’s requirements.
- Trowel: A trowel is a flat, pointed tool used for spreading and smoothing plaster. There are different types of trowels, including finishing trowels and corner trowels, each designed for specific tasks.
- Hawk: A hawk is a flat, square platform with a handle that holds the plaster as you work. It allows you to easily scoop and spread the plaster onto the wall.
- Mixing Tools: You’ll need a mixing bucket or tray and a mixing paddle to prepare the plaster mixture. Properly mixing the plaster is crucial to achieving a smooth finish.
- Safety Gear: Plastering can be messy, so wearing safety gear such as goggles, gloves, and a dust mask is essential to protect yourself.
3. Preparing the Surface
Before you start plastering, it’s crucial to prepare the surface properly. Here are the steps to follow:
- Clean the Surface: Remove any dust, debris, or loose material from the wall or ceiling you plan to plaster. A clean surface ensures that the plaster adheres properly.
- Repair Any Damage: Patch up any cracks or holes in the wall with a suitable filler or patching compound. Allow it to dry completely before proceeding.
- Priming: Applying a primer to the surface can help the plaster adhere better and create a smoother finish.
4. Mixing and Applying the Plaster
Now that your surface is ready, it’s time to mix and apply the plaster. Here’s how it’s done:
- Mix the Plaster: Follow the manufacturer’s instructions for mixing the plaster. Typically, you’ll add the plaster powder to water and stir until you achieve a smooth, lump-free consistency.
- Load the Hawk: Place a portion of the mixed plaster onto your hawk. You don’t want to overload it, as it can become challenging to work with.
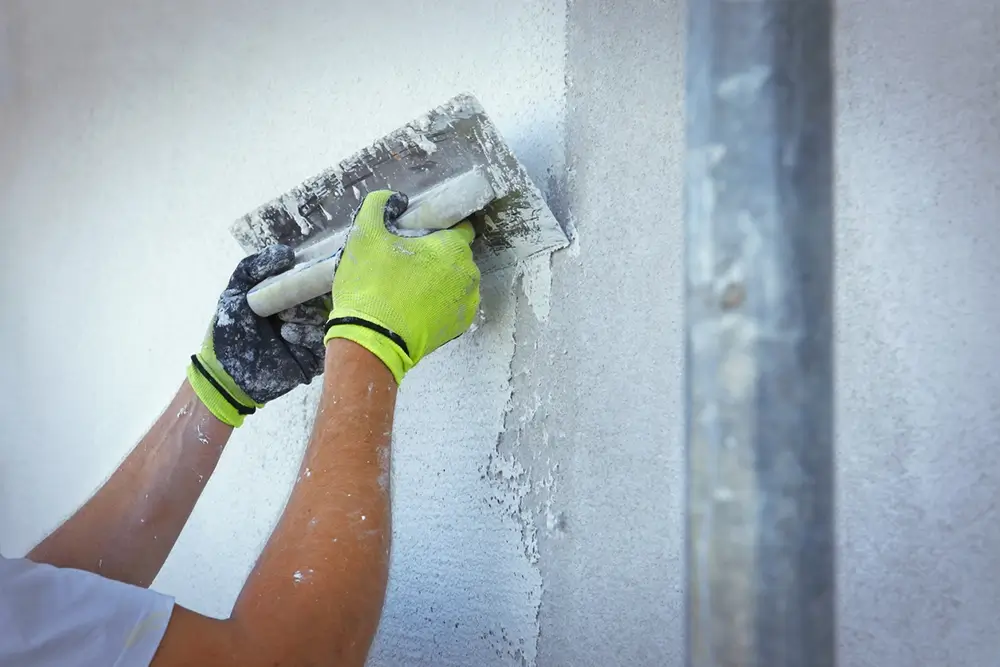
- Applying the Plaster: Start at the top of the wall or ceiling and work your way down. Hold the hawk against the surface and use the trowel to scoop up plaster. Apply the plaster in a thin, even layer, using a sweeping motion. The goal is to achieve a smooth and consistent surface.
- Feathering: As you apply the plaster, use a feathering motion with the trowel to create a gradual transition between the plastered area and the untouched surface. This helps blend the plaster seamlessly.
- Multiple Coats: Depending on the thickness of the plaster and the desired finish, you may need to apply multiple coats. Allow each coat to dry before applying the next one.
5. Finishing Touches
Once you’ve applied the plaster and it has dried, you can move on to the finishing touches:
- Sanding: After the plaster has dried, you may need to sand the surface to achieve a perfectly smooth finish. Use fine-grit sandpaper and be gentle to avoid damaging the plaster.
- Texturing (Optional): If you desire a textured finish, you can create various textures using different tools, such as brushes, sponges, or combs, while the plaster is still wet.
- Painting or Sealing: Once the plaster is completely dry and you’re satisfied with the finish, you can paint it or apply a sealer, depending on your project’s requirements.
Advanced Plastering Techniques
Now that you’ve grasped the basics of plastering, let’s explore some advanced techniques that can take your plastering skills to the next level:
1. Venetian Plaster
Venetian plaster is a luxurious and highly polished finish that originated in Venice, Italy. It’s known for its smooth, marble-like appearance and stunning depth. Achieving a Venetian plaster finish requires skill and patience. Here’s how it’s done:
- Apply a base coat of plaster to the wall and allow it to dry.
- Apply the Venetian plaster in thin, translucent layers, using a trowel or spatula.
- Polish the plaster between coats to create a smooth and glossy finish.
- Wax or seal the plaster to protect and enhance its shine.
2. Decorative Molding
Plaster can be used to create decorative moldings and ornate designs on walls and ceilings. This technique is often seen in classical and Victorian-style homes. To create decorative molding with plaster:
- Use molds or templates to shape the plaster into intricate designs.
- Apply the plaster carefully and allow it to set.
- Once the plaster is partially dry, use carving tools to refine the details.
- Paint or gild the molding for a finished look.
3. Stenciled Plaster
Stenciled plaster is a creative way to add patterns and designs to your walls. Here’s how to achieve this effect:
- Apply a base coat of plaster to the wall and let it dry.
- Use stencils to create patterns on the wall with a different color of plaster.
- Remove the stencils carefully while the plaster is still wet.
- Allow the plaster to dry completely and finish with a protective coat.
4. Faux Finishes
Plaster can mimic the appearance of various materials, such as stone, brick, or wood. Faux finishes can add character and depth to your walls. Here’s a basic outline of the process:
- Apply a base coat of plaster in the desired color.
- Use specialized tools or techniques to create the appearance of the chosen material.
- Highlight and shade the plaster to enhance the illusion.
- Seal and protect the finish.
Troubleshooting Common Plastering Problems
Even experienced plasterers encounter challenges from time to time. Here are some common plastering problems and how to address them:
1. Cracks in the Plaster
- Cause: Cracks can occur if the plaster dries too quickly or if there are structural issues with the wall.
- Solution: To prevent cracks, ensure the surface is properly prepared and the plaster is mixed and applied evenly. If cracks appear, scrape away the damaged plaster, patch the area, and reapply a fresh coat.
2. Blisters or Bubbles
- Cause: Blisters or bubbles can form if there is moisture trapped beneath the plaster or if the plaster is overworked during application.
- Solution: Carefully remove the affected area, address any moisture issues, and reapply the plaster, ensuring proper application techniques.
3. Uneven Texture
- Cause: Uneven texture can result from inconsistent plaster application or improper troweling.
- Solution: Sand down the uneven areas and reapply the plaster, paying close attention to achieving a consistent texture.
4. Plaster Peeling
- Cause: Plaster may peel if it wasn’t properly adhered to the surface during application.
- Solution: Remove the loose plaster, clean the surface, and reapply a new coat of plaster, ensuring proper adhesion.
Conclusion
Plastering is an art that requires practice and patience to master. Whether you’re tackling a simple wall repair or creating intricate decorative finishes, understanding the basics and advanced techniques of plastering will serve you well. Remember to prepare your surface thoroughly, choose the right plaster for your project, and take your time to achieve a smooth and beautiful finish. With practice and dedication, you can become a skilled plasterer and transform your living spaces into works of art.